Looking for tips and tricks on how to use Zoom?
Kipwise is a 100% remote team and web conferencing tool is one of the tools that we use almost every day to communicate with our global team.
Zoom is one of the most popular web conferencing tools on the market. In this article, we will share some Zoom tips and tricks with you, so that you can host more effective video calls and communicate more efficiently with your remote team.
Tips for scheduling and hosting Zoom meetings
1. Automatically schedule meetings (useful for sales / clients meetings)
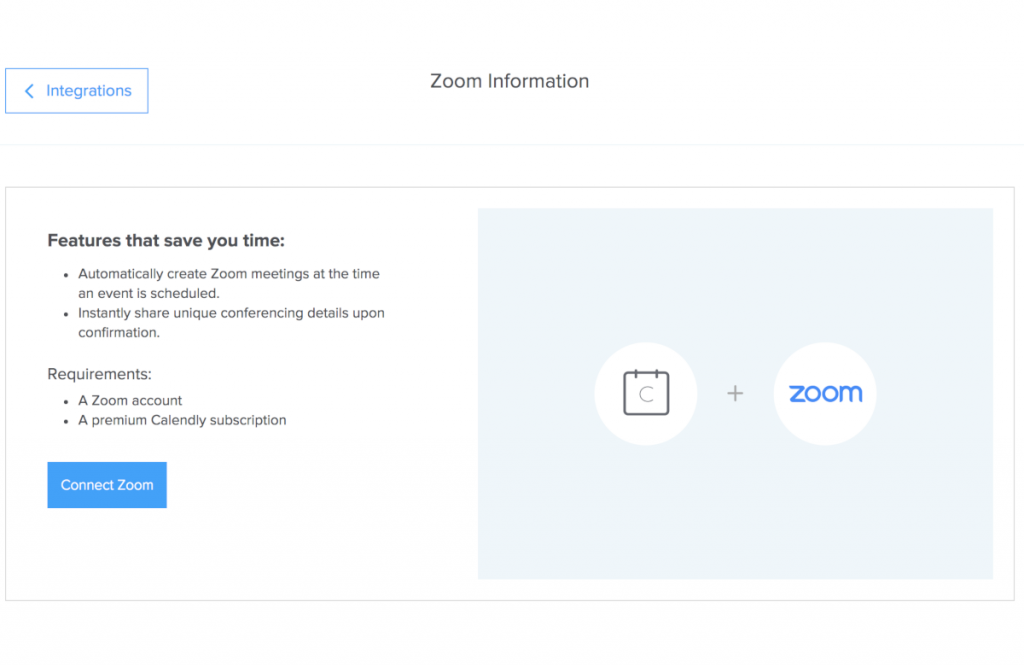
If you need to schedule a lot of meetings, for example, with your prospects or clients, you can connect your meeting scheduling app (e.g. we are using Calendly) and Zoom so that when someone books a meeting on your scheduling app, a Zoom meeting will be automatically created and added to the event.
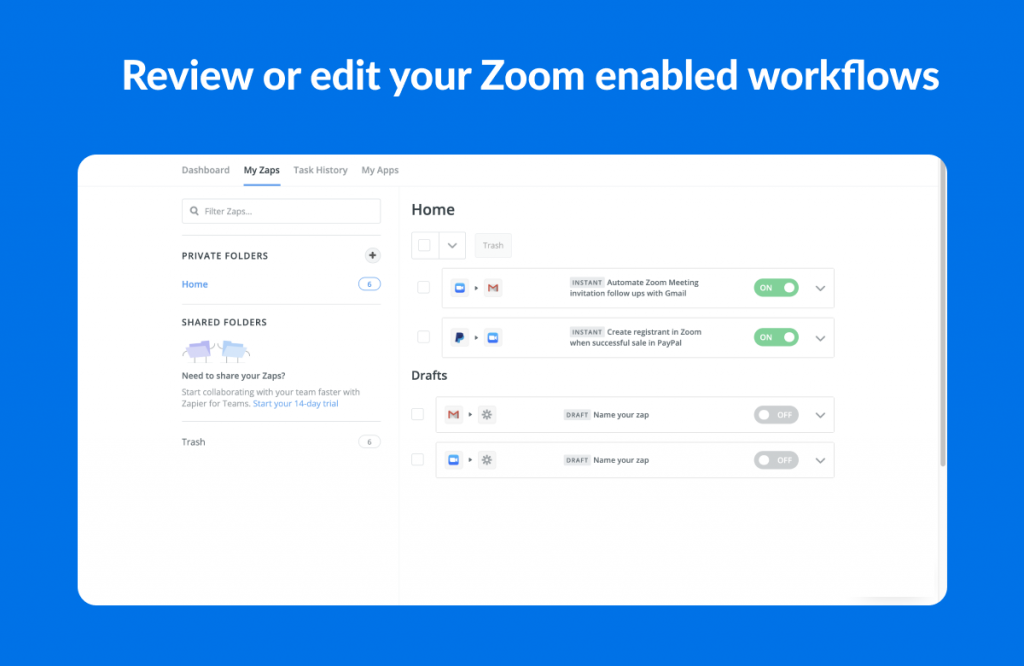
For example, some meeting scheduling apps offers integration with Zoom (see Calendly x Zoom Integration). Alternatively, you can use tools like Zapier to connect your meeting scheduling tools and calendar with Zoom (see more Zoom Integrations by Zapier)
2. Create recurring meetings with the same URL (useful for internal team meetings)
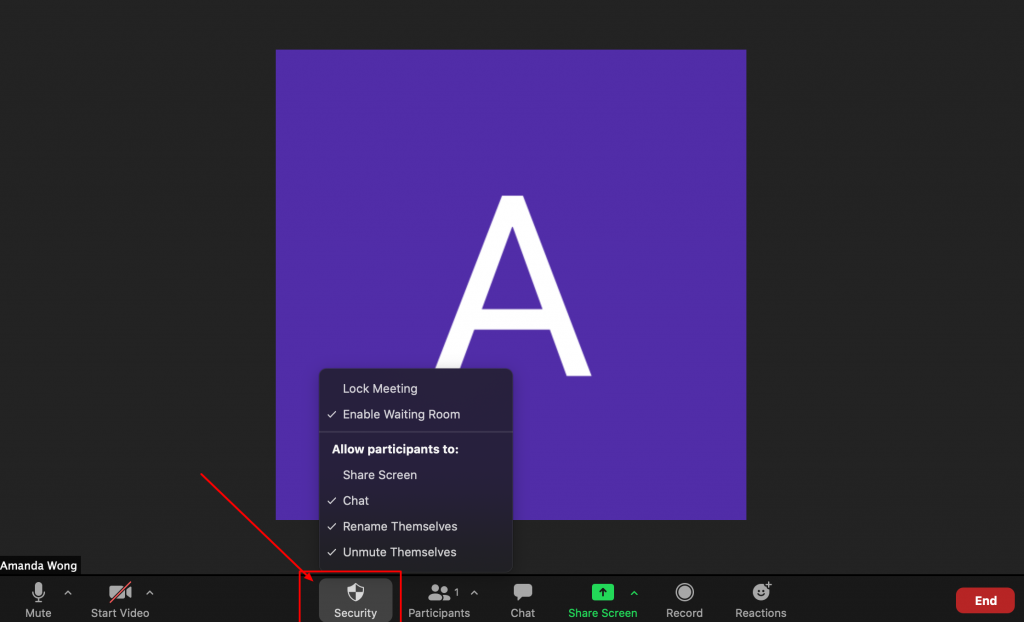
Instead of using your Personal Meeting ID (PMI) to host recurring meetings, it’s better to create different meeting URLs for different meetings because for Personal Meeting ID, once a participant has the link to your PMI, they can join your meeting at any time, no matter if they are invited, unless you lock your meeting or use the Waiting Room feature to let participants in individually.
But instead of needing to create a new link every time, you can set up recurring meetings so that participants can use the same URL to join the meeting each every time. This way, you can create different URLs for all team meetings, individual functional team check-ins, retrospective meetings etc.
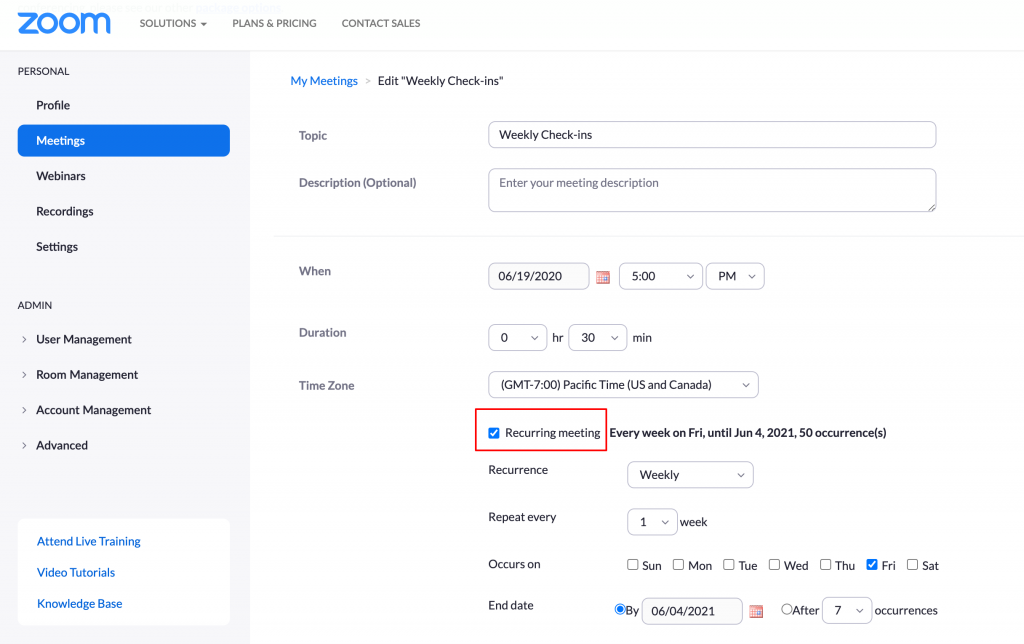
The benefits of using recurring meetings is that you can simply configure the call settings once and they will be ready for all the subsequent meetings. The recurring meetings will also use the same URL each time, so you don’t have to send a new link to attendees everytime (at Kipwise, we like to put the relevant meeting link in the description of the relevant Slack channel so teammates can access them easily).
Note that all recurring meeting URLs expire after one year, so you will have to set up a new one by then.
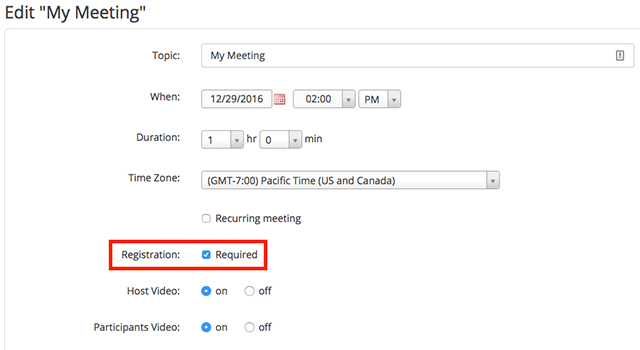
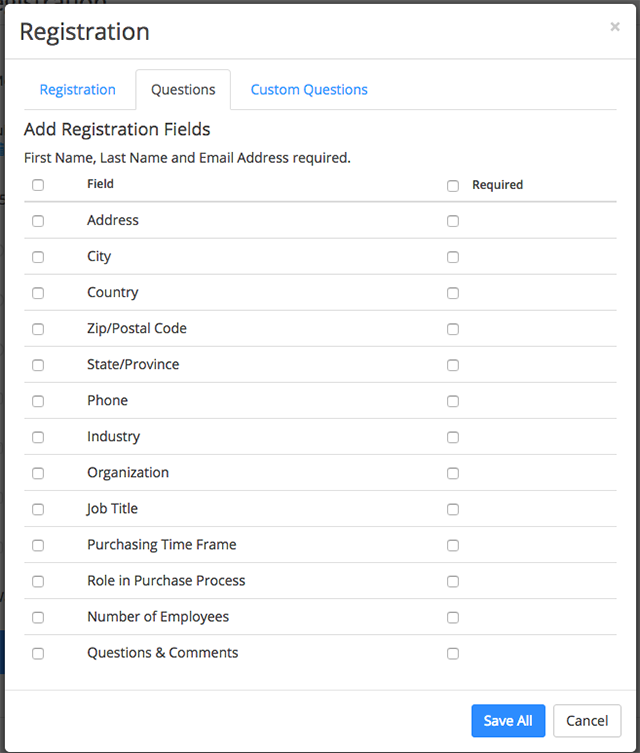
3. Collect information from attendees prior to the meeting
If you are hosting webinars, it might be useful to collect information from attendees prior to the meeting. For example, you might want to ask for their names, email addresses (so you can send them follow-ups or the recording of the meeting afterwards), company and role, etc.
To do this, you will have to create a registration form for your meeting. To do this, check the “Registration: Required” checkbox when creating the meeting and then you can create a registration with optional custom questions.
4. Let someone else schedule your meetings
If you are a busy person and would like to grant someone else, e.g. your assistant, the right to schedule Zoom calls for you, you can assign them Scheduling Privilege on Zoom.
They can then schedule meetings on your behalf and act as an alternative host for your meetings.
Tips for collaboration during Zoom meetings
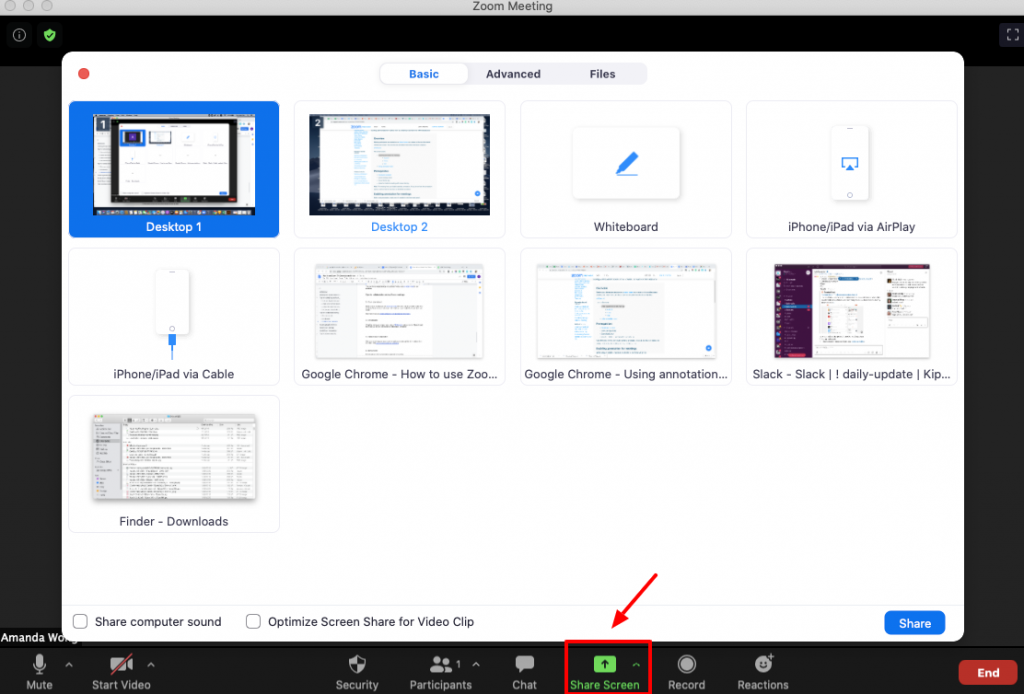
1. Share your screen
During a Zoom meeting, you can share your screen with other attendees to better explain your concepts. You can choose to share your entire desktop, a specific window or a portion of your screen.
Note that the host can prevent participants from accessing screen sharing.
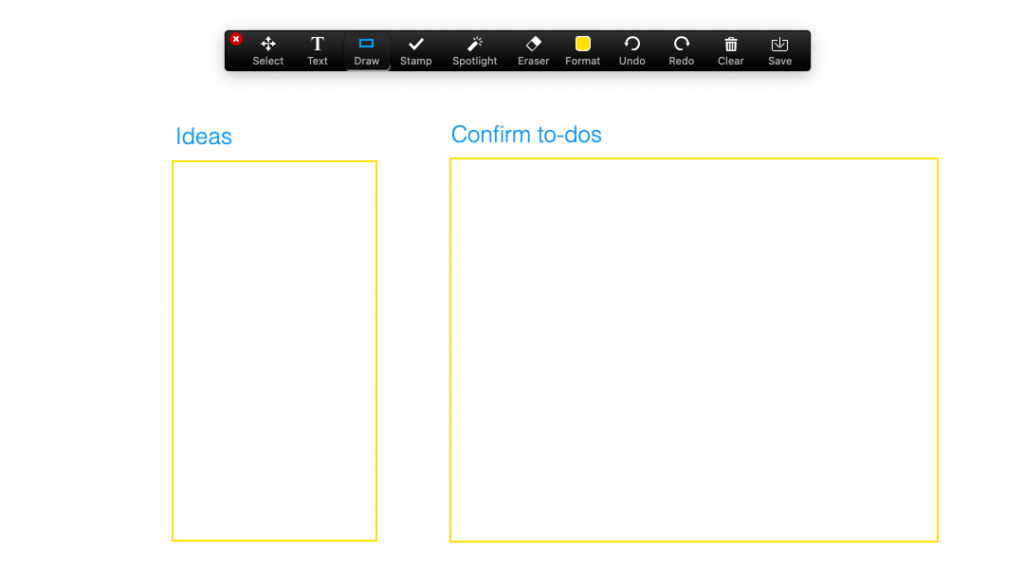
2. Whiteboards
Other than sharing your screen, there is also a “Whiteboard” option under the “Share Screen” tab, where you and your participants can collaborate to annotate on.
3. Collaborate on annotation
When you are sharing your screen or whiteboard, you can allow participants to collaborate on annotation. See how to enable annotation for meetings.
To annotate while someone is sharing their screen, select “View Option” from the top of the Zoom window, and then select “Annotate”. A toolbar will then appear and you can add text, drawings, arrows, etc.
4. React with emoji
When you are muted or when you are in a big meeting, you can now use meeting reactions to show your feedback using an emoji without interrupting the meeting.
For example, if the meeting organizer has enabled Nonverbal feedback, you can use the “Raise Hand” icon to signal that you have a question.
The emoji will appear at the top left of your window so that others can see your feedback. The Emoji will disappear after 5 seconds.
Zoom keyboard shortcuts
Zoom also supports a lot of keyboard shortcuts to save your time on actions that you are likely to perform frequently.
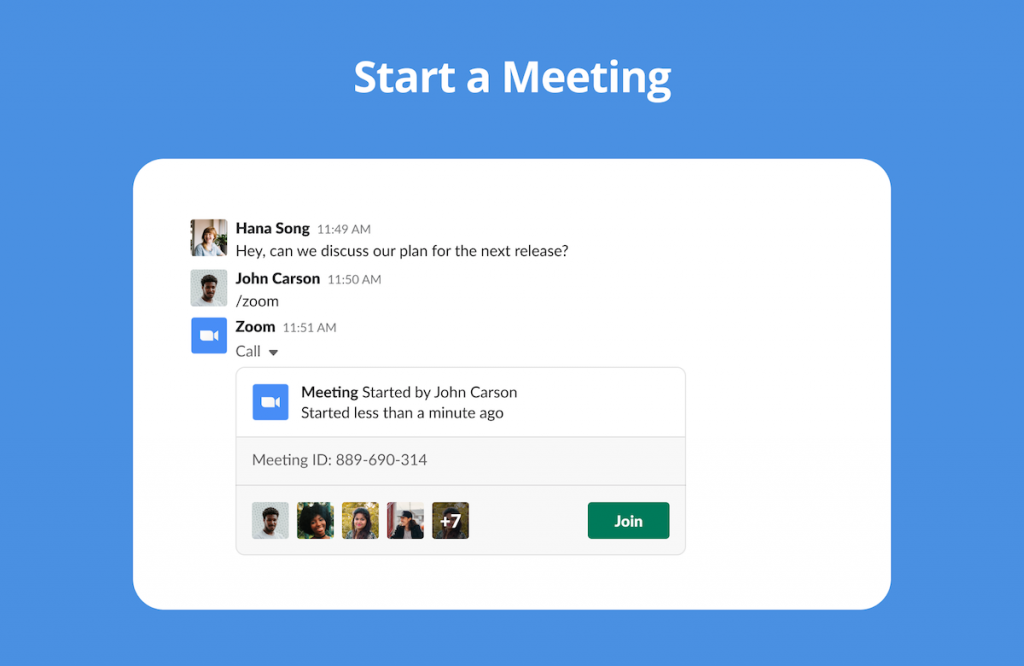
1. Quick invite
When you are in a meeting, type ⌘Cmd+I (PC: Alt+I) to open the Invite window where you can easily copy the meeting URL or full meeting Invitation to send it to anyone.
2. Mute audio
To help keep away background noises, it’s recommended that you mute your audio when you are not speaking.
During a meeting, press ⌘Cmd+Shift+A (PC: Alt+A) to mute or unmute your audio.
3. Mute everyone
Sometimes people might just forget to mute their audios. To help keep the communication clear, the host of a meeting has the option to mute everyone in the meeting at once. To do this, simply press ⌘Cmd+Ctrl+M (PC: Alt+M).
4. Turn on/off video
During a meeting, you can turn on or off your video quickly by pressing ⌘Cmd+Shift+V (PC: Alt+V).
Although to make the meeting more engaging, it’s recommended to turn on your video if internet connection is good. By allowing your teammates to see your face, it does not only help everyone feel more connected, it also helps to make communication smoother because it’s easier to avoid interruptions when you can see if a teammate looks like if they have something to say (read more tips on how to run effective remote meetings).
5. Record the meeting
Recording the meeting is a useful feature if you want to keep a record for your meeting or share it with someone who couldn’t make it to the meeting.
During a meeting, press ⌘Cmd+Shift+R (PC: Alt+R) to start recording and ⌘Cmd+Shift+P (PC: Alt+P) to pause or resume recording.
6. Share screen
To quickly share your screen with other participants during a meeting, press ⌘Cmd+Shift+S (PC: Alt+Shift+S) to start sharing and ⌘Cmd+Shift+T (PC: Alt+T) to pause or resume screen sharing.