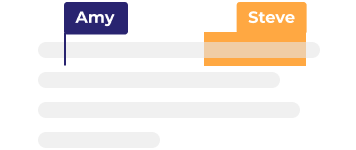
Make real-time collaboration a breeze
Enjoy real-time collaboration with our easy-to-use web editor, enabling your team to edit the same page at the same time.
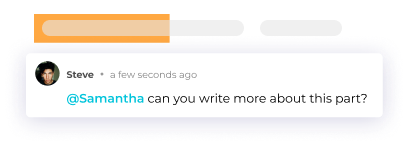
Turn knowledge sharing into a team objective, with smart, built-in workflows like our internal Q&A feature.


 Template (Customer Success%2C Remote Work).png)
 (HR %26 Recruiting%2C Remote Work).png)
.png)


%402x.png)
%402x.png)
%402x.png)
%402x.png)
%402x.png)
%402x.png)
%402x.png)